Tips for Night Photography

The time after sunset offers incredible opportunities for photographers. Night photography may seem challenging at first, but with Mikael Rantalainen’s tips you can achieve striking results.
Equipment
Night photos can be taken with almost any camera and lens, but for the best results use a DSLR or mirrorless body with a fast wide-angle lens for the Milky Way and auroras. The moon can be photographed with any lens, though a 300–600 mm telephoto makes it appear larger.
Exposure times range from 1/100 second to several tens of seconds, so a sturdy tripod is essential. Use a remote release or the camera’s self-timer to avoid shake.
Settings for Different Subjects
Stars
Keep shutter speed short enough to avoid star trails. Manually focus on stars or distant foreground elements (30+ m).
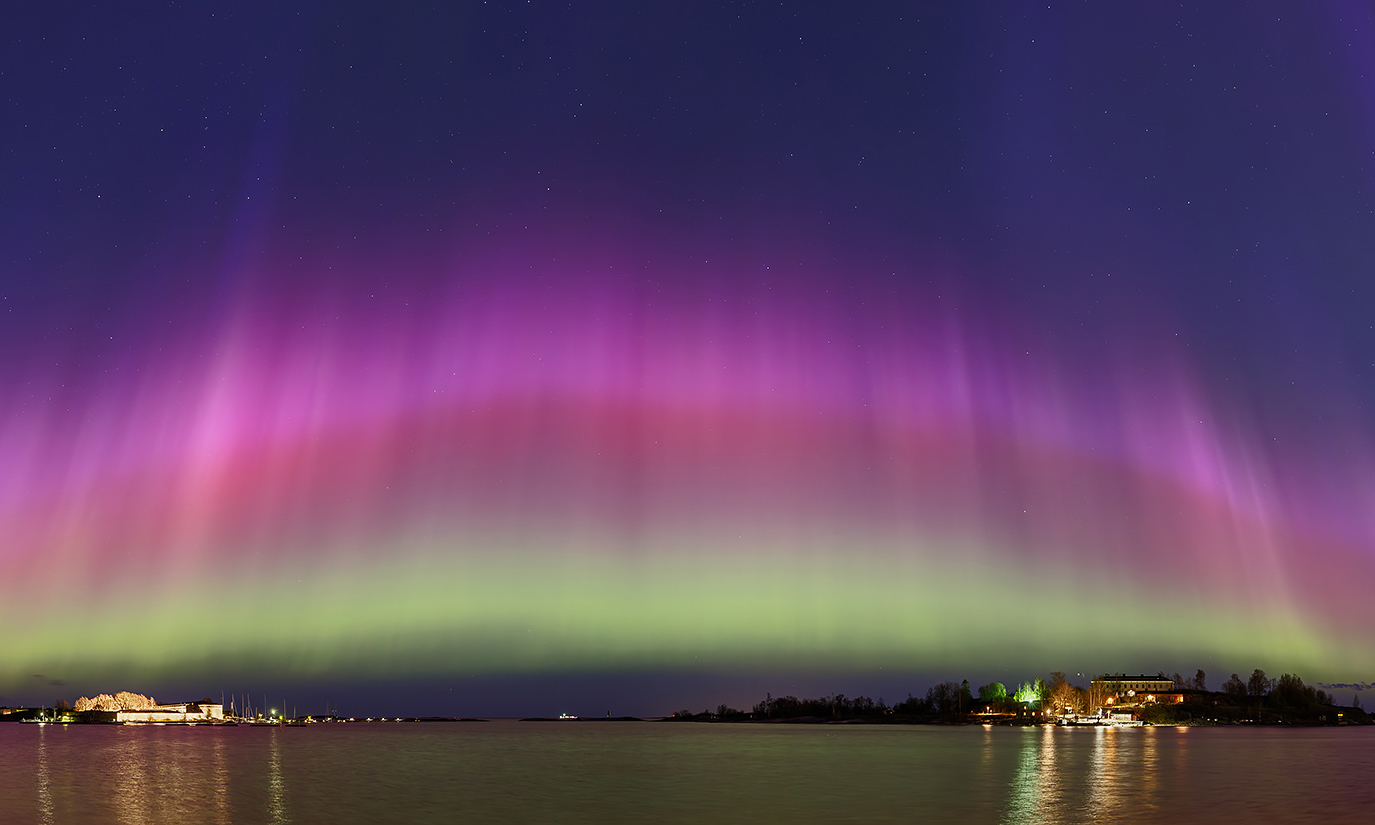
Milky Way & Auroras
For the Milky Way, use a shutter speed of 10–25 seconds depending on your focal length. Divide 350 by your focal length to calculate the maximum exposure time (e.g. 350 / 20 mm → less than 17 seconds). Longer exposures will cause star trails.
For auroras, use 1–15 seconds — the more active the aurora, the shorter the exposure needed to freeze its movement. Adjust shutter speed to match the aurora’s brightness and movement. Manually focus on stars or distant foreground elements (at least 30 m away).
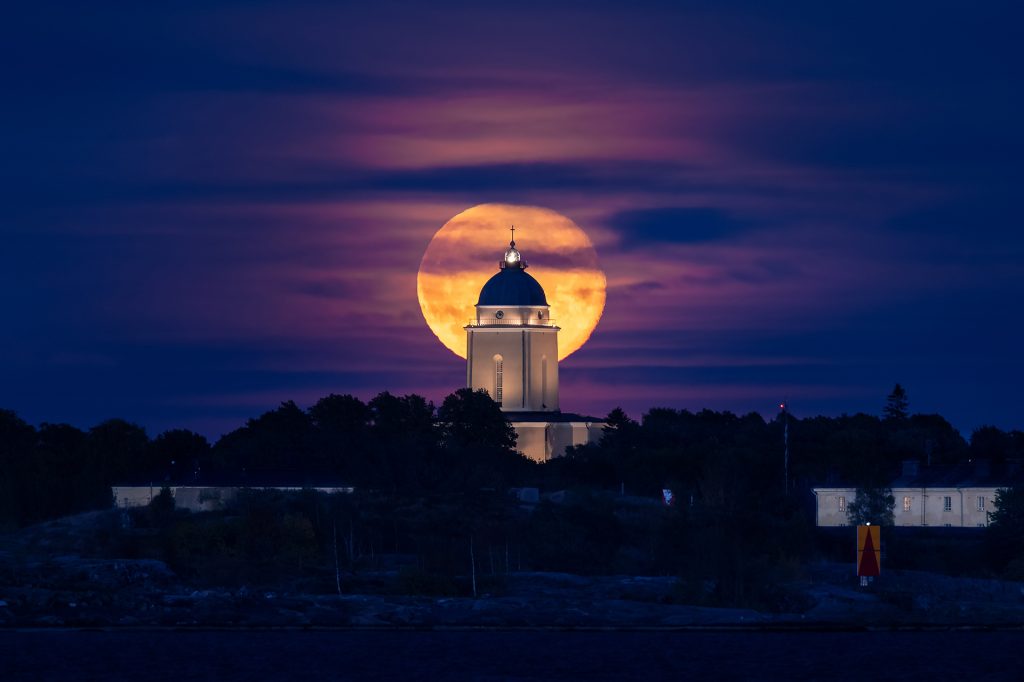
Moon
When the moon is near the horizon it appears dimmer, so with a telephoto lens you’ll typically need to use the lens’s maximum aperture. Once the moon is higher and brighter, you can stop down to around f/8–f/11 for increased sharpness. Shutter speeds are much shorter than for stars — usually between 1/10 and 1/100 second, depending on the phase and brightness of the moon. With a wide-angle lens, the moon is just an additional element in the landscape – focus on the foreground. With a telephoto lens, the moon alone can be boring; try including a landmark. Use autofocus on the landmark or the moon.
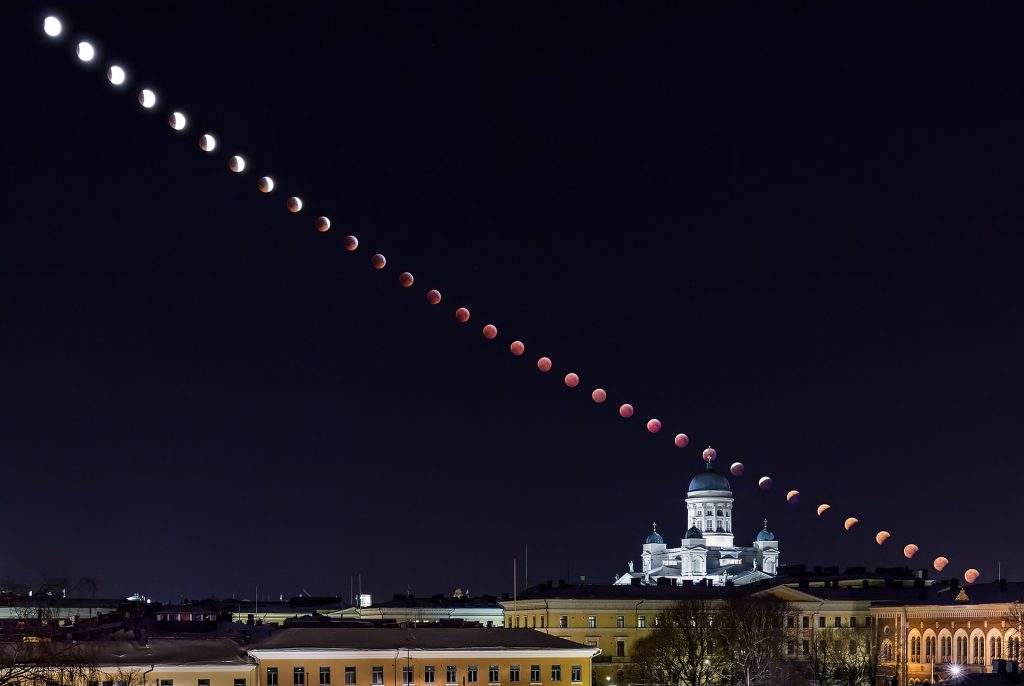
Lunar Eclipse
A telephoto lens (300–600 mm) is ideal for capturing colour and detail, while a wide-angle lens allows you to include the landscape and show the different phases of the eclipse in a single image by combining several shots in Photoshop. Exposure times vary: during the partial phases settings are similar to those for a normal full moon, with shutter speeds of about 1/10–1/100 second depending on brightness. During totality, much longer exposures are needed — from a quarter of a second to several seconds — at higher ISO values of 3200–6400. With long telephoto lenses, achieving sharpness can be difficult, so a shorter focal length with a faster aperture may be a better choice. If you want to capture both the illuminated part of the moon without overexposure and the shadowed portion, you’ll likely need to bracket exposures and combine them later in Photoshop.
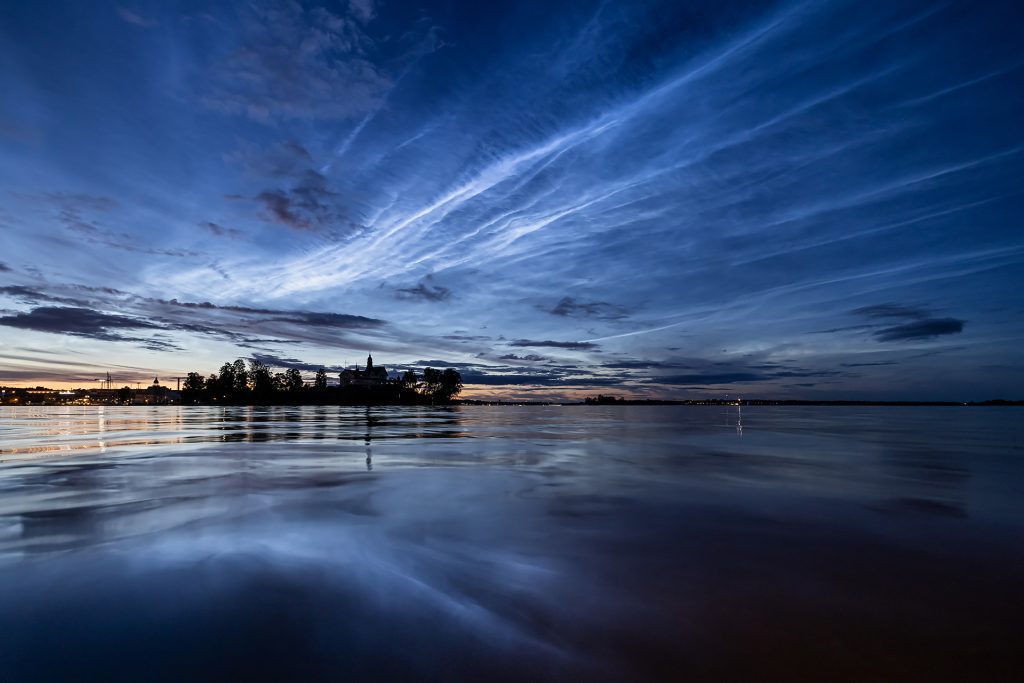
Blue Hour Cityscapes and Noctilucent Clouds
These are among the easiest subjects for night photography, since there is usually no movement to freeze. This allows shutter speeds of up to 30 seconds, with lower ISOs between 400 and 1600. The focal length can be chosen freely based on the scenery, typically between 14 and 200 mm. The best blue hour cityscapes are captured when the deep blue sky and the warm city lights are in balance. Reflections can also be used to enhance and duplicate the glow of city lights or noctilucent clouds.
| Subject | Lens | Aperture (f) | ISO Range | Shutter speed |
| Stars | 14–24 mm | 1.4–4 | 1600–6400 | 10–25 sec |
| Aurora | 14–35 mm | 1.4–4 | 1600–6400 | 1–15 sec |
| Moon with wide-angle | 15–35 mm | 4–10 | 100–400 | 1/100–1/2 sec |
| Moon with tele lens | 200–600 mm | 4–10 | 400–3200 | 1/100–1/10 sec |
| Lunar Eclipse with wide angle | 24–50 mm | 4–8 | 400–3200 | 1/10–1 sec |
| Lunar Eclpise with tele lens | 200–600 mm | 4–8 | 1600–6400 | 1/15–4 sec |
Plan Ahead
A great night photo requires preparation. Scout your location in daylight for compositions and foregrounds. In cities, seek landmarks, reflections, and illuminated structures. Check weather forecasts and cloud cover. For tracking the position of the moon, the Milky Way, and the sun, use apps such as The Photographer’s Ephemeris or PhotoPills.
Learn more!
Join Mikael’s photography courses and webinars, some of which are also available in his webshop. You can find more stunning images on his Night Collection, Instagram and website.